|
5. Installing the iTivity iAgents on Windows
iTivity iAgents are software components that allow secure connections to an iServer and remote viewing and control of the computer on which the iAgent is installed. iAgents can be installed on a Windows computer from a distribution MSI file or from web page or e-mail link, by downloading a custom EXE installer. This chapter explains: · How to install the Unattended iAgent or Attended iAgent from · How to install the Support Module, which contains all of the iAgent components. · How administrators can set up web pages to allow one-click install of the iAgents, including how to configure installation settings in the HTML files. · How end-users perform the one-click install. Note: For information on installing and running the Unattended iAgent on UNIX/Linux systems, see Chapter 8. Other Installation Options: · You can automate installation on Windows. See Appendix A in this guide. · You can also create custom installers on the Tridia Support web site. See Appendix B. 5.1 System Requirements
The Attended iAgent and Unattended iAgent both can run on the following Windows platforms: · Windows XP Pro · Windows Server 2003 · Windows Vista · Windows Server 2008 · Windows 7 · Windows Server 2012 · Windows 8 · Windows Surface Pro · Windows 8.1 · Windows 10 · Windows Embedded Standard and Professional Disk space required to install the Unattended iAgent is approximately 12MB and for the Attended iAgent approximately 120 MB of disk space is required. 5.2 Installing the Unattended iAgent or Attended iAgent From the Distribution EXE
Installation Options
You have several options for installing the iAgents on Windows: · Install from a distribution MSI file downloaded from the Tridia web site. This procedure is explained in this section. · Use the distribution MSI file and automate the installation with a silent install command line options. This option is explained in Appendix A. · Create a custom installer for your needs. See Appendix B. Installing via Terminal Services
If the computer you want to install the iAgent on is running Microsoft Terminal Services, you can install and start the iAgent software remotely. Simply open a Terminal Services session, copy the distribution MSI to the computer and the follow the Instructions below. Instructions
1. Download the distribution MSI file for the iAgent you are installing from the Tridia web site. After saving this file to disk, right-click on it and Install the file. The following Welcome dialog is displayed:
2. Click Next. The License Agreement page is displayed.
3. Scroll Down to view the entire agreement. Then click "I accept the terms in the license agreement" to indicate your acceptance. Then click Next. The Setup Type dialog is displayed.
4. Click the Advanced option to specify settings if desired. Either way, click Next to continue. The Destination Folder dialog is displayed.
5. Change the Folder if desired. Click Next to continue. The Application Configuration dialog is displayed.
The Computer Name refers to the name of the system where you are installing the iAgent software. Typically, this is a remote server or desktop. The name you specify here will be displayed in the iManager after this iAgent system connects to the iServer. The Description should be a short description of the computer's purpose and/or location. This field is optional. The Import Configuration Settings from URL may optionally refer to a web accessible registry settings file. This setting is also optional, most customers will leave it blank. This "Reg" file, if any, is stored on your web server to allow for extended configuration of registry settings as the installer is finishing. 6. After updating the fields as needed, click Next. The following dialog is displayed.
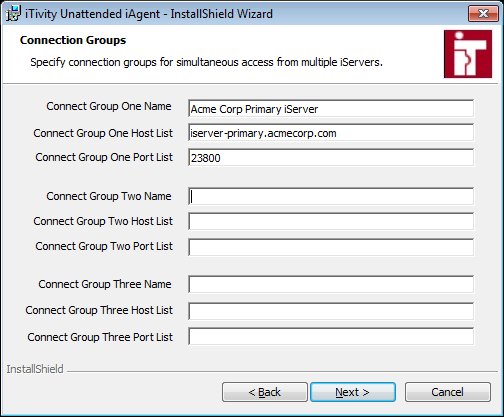
The iServer refers to the host name (or IP address) of the system where you are running the iServer. For connections over the Internet, this may be a host name that resolves to a public IP address on your firewall. This field is required. The Port field should be the port number where the iServer is listening for iAgent connections. The default port number is 23800, although many customers prefer port 443 because it allows for more seamless connectivity is some environments. This should be an integer between 1 and 65535. This port number should match the configuration of your iServer and/or firewall rules. This field is required. The iTivity Support Domain may optionally specify one or more permission groups on the iServer that are allowed to access this iAgent system. This setting is optional, most customers will leave it blank. You should only specify a support domain that is configured on your iServer. For more information on support domains, see the iTivity Deployment Guide. 7. After updating the fields as needed, click Next. The following dialog appears, allowing you to optionally specify multiple iServers.
Officially, these are all optional. However, Tridia strongly encourages all users to fill out connect group one. This is important for the use of the iAgent settings feature in the iManager. Most users should provide the same iServer connection information provided in the previous dialog as connect group one in this dialog. If you choose to specify more than one connect group, please insure that each connect group refers to a distinct, separate iServer system. The Connect Group Name provides a human-readable name for this iServer connection. You can choose any name that makes sense in your environment. The Connect Group Host List contains a comma-separated list of host names and/or IP addresses for the connection group. If you specify multiple hosts, the iAgent will attempt to connect to each one until a successful connection is found. This behavior is appropriate when you are running an iServer farm and the iAgent needs to connect to exactly one system in the farm. The Connect Group Port List provides a comma-separated list of port numbers that should be used when attempting to connect to the iServer hosts. In some cases, a customer may wish to accept iAgent connections on multiple ports and have the iAgent automatically attempt connections over each port in the list. The iAgent will try various combinations of host name and port number until a successful connection is established. 8. Click Next to continue. The Authentication Method dialog is displayed.
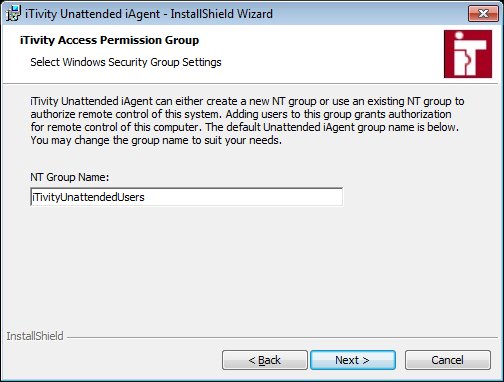
These choices define how a user of iTivity iManager must authenticate before being allowed to view and remotely control this computer. s NTLM (Microsoft Authentication): Also known as "Active Directory", the iTivity iManager prompts for the Windows username and password and then sends the credentials to the iAgent system. The iAgent system authenticates the username and password against a Microsoft Domain or local database, eliminating the need for a separate local password on every system. NTLM authentication can be used both in an Active Directory environment as well as on a standalone Windows Server or Workstation, such as Windows 8, Windows 7, Windows Surface Pro, Windows Embedded Standard/Professional or Windows XP. s Simple Password: Each system running the Unattended or Attended iAgent has its own password that must be entered by the remote user trying to view. Use this option if you want iTivity iManager authentication to use separate passwords from Microsoft (NTLM) authentication. s No Authentication Required: No login is required. This option is strongly discouraged. However, if the authentication at the iServer is deemed sufficient, then it may make sense to disable authentication at the iAgent in some situations. Choose the authentication method and click Next to continue. 9. The Access Permission Group dialog is displayed, if you selected the NTLM authentication method.
This dialog allows you to specify which Windows security or permission group at the iAgent (either local or on the domain) will be used to control which Windows users have permission to access the system via iTivity. Most customers leave this setting at the default. By default, the "Administrator" user account, "Administrators" group and "Domain Admins" group are automatically inserted in the permission group, if they are present. If you require iTivity access permission for other users, then you should add them to this security group or a nested group. 10. Change the group name as needed. Click Next to continue. The iServer Public Encryption Certificate dialog is displayed.
By default, the iAgent software requires a way to verify that the iServer is trusted. This is a required step in any system that uses strong encryption in order to prevent the well-known class of attack vectors known as "man-in-the-middle" attacks. Establishing this trust is accomplished through a "Public Key Certificate" mechanism and deploying the public key certificate is known as "PKI" or "Public Key Infrastructure". There are three options for configuring the iAgent to iServer certificate verification. s Install Public Key Certificate Provide the URL for your iServer's public key certificate in the Transfer public certificate from URL field. Section 2.4, Deploying the iServer Public Key, of the iTivity Deployment Guide describes how to find and configure this URL on one of your web servers. s Confirm Certificate Fingerprint Make sure the radio box is checked for the "Prompt to verify any changes to the encryption certificate at the iServer?" option. When the iAgent software first connects to the iServer, it will prompt the console user to verify the encryption fingerprint from the iServer. Once the user confirms the encryption fingerprint, the iAgent will store the confirmation and will not prompt again unless the IP address of the iServer changes. This is not the best practice approach, however, some customers do not wish to deploy the public key certificate. s Disable Certificate Verification Uncheck the radio box labelled "Prompt to verify any changes to the encryption certificate at the iServer?" in order to disable certificate verification in the iAgent encryption software. This option is strongly discouraged.. 11. Update the public key certificate settings as needed. Click Next to continue.. The Icon Customization URL dialog is displayed.
If you wish to change the desktop icon associated with launching the Attended iAgent, please specify a fully qualified URL for the "ICO" file containing your custom icon. Most users do not customize this icon. Many users who do choose to customize the icon use the support.tridia.com web site to build a custom installer with this icon URL embedded in the installer. 12. Enter your icon file URL if needed and click Next to continue.
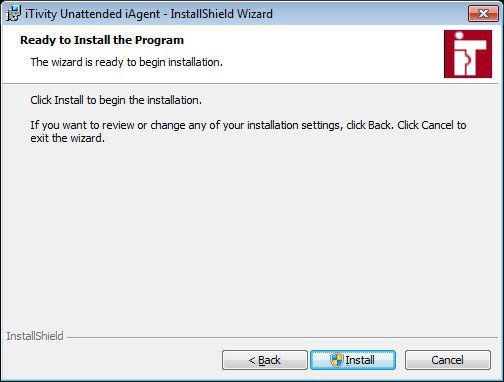
If you select Display the Connection Settings dialog option, then each time the iAgent is launched a dialog will be displayed to allow the user to review and possibly adjust the connection settings. This is usually only appropriate for systems used by technical administrators. If you enable secure dial, this becomes the iTivity connection method for this iAgent computer. iTivity connection via the Internet will be disabled. If you select the Start iTivity Unattended iAgent and request help now option, the iAgent is launched as soon as the installation finishes. This does not change any product settings. 13. Select the desired settings and click Next to continue. The installer is now ready to begin copying the iServer files and configuring the iServer settings.
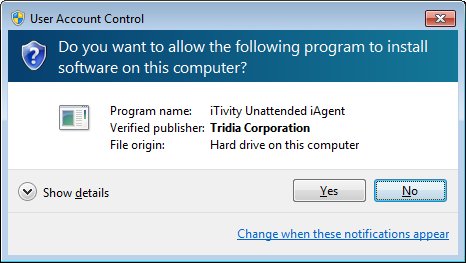
Click Install to begin copying files and configuring the iAgent software. 14. Next the installer prompts for elevated privileges needed to perform the installation.
Click Yes to continue. Next the installer displays a progress bar showing the status of the iAgent installation and configuration.
15. The following dialog is displayed when the installer finishes.
16. The installation is now complete. Click Finish to exit. 5.3 Installing the Unattended iAgent or Attended iAgent From the Custom EXE
In order to use the instructions in this section, you must create your own custom EXE installers for the iTivity iAgents via the Tridia support web site, as explained in Appendix B. These installers automate the deployment of iTivity software that is optimized for use by your organization. This provides an exceptional level of uniformity and reliability that can be difficult to achieve using manual installations. Note: Some iTivity users prefer to deploy the iAgent software as part of a system image using disk cloning software such as Ghost or Clonezilla. This is a perfectly viable approach as long as you are preparing the system hardware from scratch. 1. Download the custom installer EXE from the Tridia support web site. After saving this file to disk, launch the installer via double-click or right-click Open. The following security dialog is displayed:
2. Click Run to continue the custom installation. The Extract and Install dialog is displayed.
This is the final dialog before the automated, custom installer begins deploying the iTivity iAgent software. If you prefer not to proceed with the installation, you may click Done to exit the installer at this time. 3. Click the Extract and Install button to launch the customized installation of the iTivity iAgent. Next the installer prompts for elevated privileges needed to perform the installation..
4. Click Yes to continue. The installer displays a dialog which prompts for the computer name. This is a configurable option for the Windows iAgent custom installers on the Tridia support web site.
5. Enter the name for this iAgent computer that you wish to be displayed in the iManager. Click Ok to continue. Next the installer displays a progress bar depicting the status of the iAgent installation.
When the installation is complete, the installer displays a confirmation dialog.
6. Click Ok to close the installer and exit. 5.4 Using the iTivity iAgents with a Proxy Server
The Unattended and Attended iAgents can be configured to connect to an iServer through a proxy server running the HTTP or SOCKS v4 or v5 protocols. SOCKS is an open Internet standard for performing network proxies at the transport layer. The following configuration information applies to both SOCKS version 4 and 5. Proxy Server Modes
Four modes of proxy server use are supported by both iAgents.
Configuring Proxy Settings
On iAgent systems running Windows, you configure the proxy settings by editing the Windows Registry. The Proxy Mode is defined by the "socksMode" and "hProxyMode" settings. Following are example Registry settings. Unattended iAgent Registry Example
Attended iAgent Registry Example
Copyright © 2017 - 2023, iTivity Corporation |