|
2. Installing and Running the iServer
You can obtain the installation program for the iServer from Tridia. In order to use the iServer, it must be licensed for the number of connections you will run. Refer to Section 2.4, Licensing the iServer on Windows, or Section 2.10, Licensing the iServer on Linux for more information. 2.1 Windows System Requirements
The minimum platform for the iServer includes the following. Hardware· 1.5 GHz x86 Intel-based CPU · 1 GB RAM · At least 1 GB free disk space · At least a 100Mb network card (recommended) SoftwareAny of the following: · Windows 2000 Server · Windows Server 2003 · Windows 7 · Windows Server 2008 · Windows 8 · Windows Server 2012 Note: While other versions of Windows are supported under the minimum requirements, the latest version of Windows Server 2003, Windows Server 2008 or Windows Server 2012 with the latest service packs is highly recommended, especially for enterprise-scale deployments. 2.2 RAM Requirements
RAM requirements on the iServer depend on the number of connecting iAgents and iManagers and the number of active sessions between the iManager and iAgent systems.
See the iTivity Deployment Guide for more information and recommendations on iServer requirements. 2.3 Installing the iServer on Windows
You can obtain the iServer distribution MSI via download from Tridia. Contact Tridia for more information. Other Installation Options: · You can automate installation on Windows. See Appendix A in this guide. · You can also create custom installers on the Tridia Support web site. See Appendix B. After installing the iServer component, it is recommended that you review the Readme file for the most current product information. You will find this file located at C:\Program Files\iTivity\iServer\README.txt. 1. Download the distribution EXE file the Tridia web site. After saving this file to disk, open the file. The following Welcome dialog is displayed:
2. Click Next. The License Agreement page is displayed.
3. Scroll Down to view the entire agreement. Then click "I accept the terms in the license agreement" to indicate your acceptance. Click Next. The following dialog is displayed.
4. Click the Custom option to select features if desired. Either way, click Next to continue. The Destination Folder dialog is displayed.
5. Change the Folder if desired. Click Next to continue. 6. The iServer Port Numbers dialog is displayed.
7. Change the port numbers if needed. Many customers use the default port numbers. The most common change is two switch the iAgent port to port number 443. If you are upgrading the iServer, the installer will display the current setting and there is no need for any change. Click Next. The following dialog is displayed.
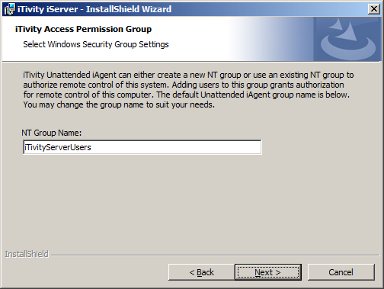
These choices define how a user of iTivity iManager must authenticate before being allowed to open a connection to the iServer. Choose one of the following authentication methods, then click Next to continue. s NTLM (Microsoft Authentication): iTivity iManager authenticates the username and password against a Microsoft Domain or local database, eliminating the need for a separate local password on every system. NTLM authentication can be used both in an NT domain environment as well as on a standalone Windows NT, 2000 or XP system. s Simple Password: Each iServer has its own password that must be entered by the iManager user trying to connect. Use this option if you want iTivity iManager authentication to use separate passwords from Microsoft (NTLM) authentication. s No Authentication Required: No login is required. This option is strongly discouraged. 8. After selecting the authentication method, click Next. The next step depends on which method you chose in Step 7. The Access Permission Group dialog is displayed:
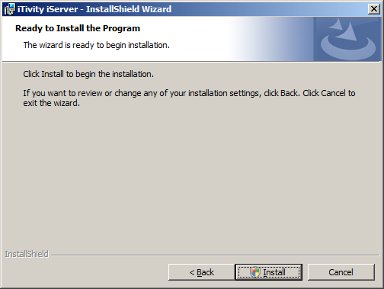
iManager users must belong to this group to log in to the iServer. Provide a different permission group name or accept the default. Then click Next to continue. 9. The installer is now ready to begin copying the iServer files and configuring the iServer settings.
Click Install to continue. 10. Next the installer prompts for elevated privileges needed to perform the installation.
Click Continue to authorize the iServer installation. The installer displays a progress bar depicting the status of the installation and configuration.
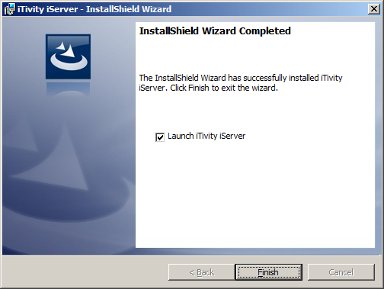
11. The following dialog is displayed when the installer finishes.
The installation is now complete. Click Finish to exit. 2.4 Licensing the iServer on Windows
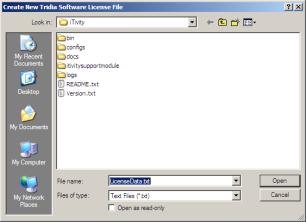
After installing, you must license the iServer to make it operable. As explained in the Welcome to iTivity section of this guide, your iTivity license allows a given number of concurrent connections between iManagers and iAgents through the iServer. The license you purchase determines the number of concurrent connections that your iServer allows. Note: It is also possible to license iAgent software separately. When an iAgent is licensed separately, its connection to an iServer does not count as one of the connections allowed by the iServer license. Contact Tridia for more information on this option. 2.4.1 Obtaining the License Key and Activation KeyWhen you purchase your license, Tridia provides a license key. The license key is a series of numbers with hyphens: Example: 533-0025-32-112012527 When you install the iServer, the install process generates an install code. This install code is displayed on the License Status dialog (see Section 2.4.4, below). To activate your iServer, you use the install code to obtain an activation key. The activation key is generated based on the install code and is unique to your iServer system. To obtain your activation key: 1. After installing the iServer, choose Start > All Programs > iTivity > iTivity iServer > Tridia Licensing > License Information to display the License information dialog. Note the install code. 2. Contact Tridia with the install code to obtain your activation key, or visit the Tridia Support Site at https://support.tridia.com/ and choose the Licensing option. After obtaining both the license key and activation key, you can proceed with licensing the iServer. 2.4.2 Creating the License FileAfter obtaining your license key and activation key, follow these steps to license the iServer: 1. Select Start > All Programs > iTivity > iServer > Tridia Licensing > Create or Locate Tridia License File. The Create New Tridia Software License File dialog is displayed.
2. Click Open to create the file with the default name and location. The license file is created and opened in Notepad.
3. Below the comment area, enter your license key and activation key, separated by a colon. Example: 533-0025-32-112012527:DIBDRGS:AHWONGS:MMJYEAK 4. Save the file and exit Notepad. The iServer is now licensed. 2.4.3 Editing the License FileYou can use the Start > All Programs > iTivity > iServer > Tridia Licensing > Edit Tridia License File option to add a new license key to a license file that you previously created. This option is typically used to add licenses to allow the iServer to support additional connections. 2.4.4 Viewing License InformationYou can use the Start > All Programs > iTivity > iServer > Tridia Licensing > License Information option to view your current license status, including the allowed number of iAgent connections.
2.5 iServer Windows Start Menu Options
After the iServer is installed, the following Window Start menu options are available.
2.5.1 Administrative ToolsChoosing Start > All Programs > iTivity > iServer > Administrative Tools opens a menu with additional options.
2.5.1.1 Configure Automatic iTivity iServer Start
Choose this option to set up the iServer to start automatically each time the system starts. 2.5.1.2 Configure Manual iTivity iServer Start
Choose this option to set up the iServer to start on demand. You can then start the iServer by choosing Start > All Programs > iTivity > iServer > Administrative Tools > Configure Manual iServer Start. 2.5.1.3 License Snapshot to Activity Log
Choose this option to cause the iServer to write the current license status to the activity log. This allows you to obtain a snapsop of all iServer users and the number of licenses they are each using. Refer to Section 2.12, iServer Activity Log for more information on the activity log that receives this license snapshot. 2.5.1.4 Reload iTivity iServer Changes
Choose this option to the reload iServer operating parameters without having to stop and restart the iServer. This allows you to change iServer settings without interrupting live connections. For example, if a new license key is added to expand the number of licensed users, an administrator can use this option to load the new license data without interfering with current users. 2.5.1.5 Remove iTivity iServer Configure
Choose this option to temporarily disable the iServer software. This option causes the iServer Windows services to be removed from the Services database. To re-enable the iServer, choose Start > All Programs > iTivity > iServer > Administrative Tools > Configure Automatic iServer Start or Start > All Programs > iTivity > iServer > Administrative Tools > Configure Manual iServer Start. 2.5.1.6 Rotate iServer Activity Log
You can use this option to "rotate" or increment the numbering of the iServer activity log without stopping the iServer. This means that the current log file is renamed to "xxx.log.1" Any existing xxx.log.1 is renamed to xxx.log.2, and so on. For information on the iServer activity log, see the iTivity Deployment Guide. 2.5.1.7 Rotate iServer Error Log
You can use this option to "rotate" or increment the numbering of the iServer error log without stopping the iServer. This means that the current log file is renamed to "xxx.log.1" Any existing xxx.log.1 is renamed to xxx.log.2, and so on. For information on the iServer error log, see the iTivity Deployment Guide. 2.5.1.8 Set iServer Simple Password
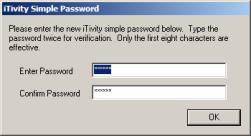
You can use this option to change the password used by a remote user of iTivity iManager to connect to this iServer. This password applies only if Simple Password was chosen as the Authentication Method when the iServer was installed. If another Authentication Method was chosen, any entry in this dialog is ignored. Enter the password twice, then click OK to reset the password.
2.5.2 DocumentationChoose Start > All Programs > iTivity > iServer > Documentation > iTivity Online Help to display the iTivity online Help. 2.5.3 Tridia LicensingUse this option to create or edit your license file for the iServer. See Section 2.4, Licensing the iServer on Windows, for instructions. 2.5.4 About iTivity iServerChoose Start > All Programs > iTivity > iServer > About iTivity iServer to display the About dialog containing version information.
2.5.5 Start iTivity iServerChoose Start > All Programs > iTivity > iServer > Start iServer to start the iServer software. You need to use this option only if the iServer is not configured to start on system startup. 2.5.6 Stop iTivity iServerYou can use the Start > All Programs > iTivity > iServer > Stop iServer option to stop the iServer whenever it is running. Caution: All current connections to the iServer are immediately lost. 2.6 iServer Windows System Tray Menu
When the iServer is started, the following icon is displayed in the Windows System tray:
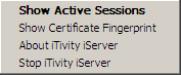
Right-click on this icon to display the System Tray menu.
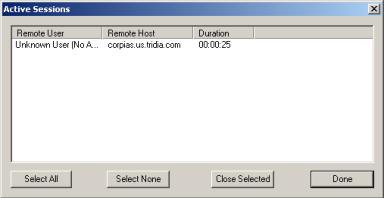
2.6.1 Show Active SessionsThis option displays a dialog showing active remote control sessions currently connected to the iServer. You can use the buttons to select and close any or all of the sessions. When NTLM authentication is used, the NTLM user name is shown for each session. The name of the iServer is shown in the remote host column.
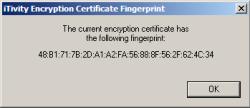
2.6.2 Show Certificate FingerprintThe iServer automatically generates a local default 2048-bit RSA encryption certificate the first time it runs. This unique certificate is presented to the iTivity iManager to ensure encryption of all data transmitted between the iServer and the iManager. Selecting the Show Certificate Fingerprint option displays the Certificate Fingerprint.
The first time the iManager or iAgent attempts to connect to this iServer, the user is asked to confirm the certificate fingerprint. After the first connection, the iManager or iAgent computer retains the fingerprint in its cache for the next viewing session. Note: On iAgent systems, the behavior to check the certificate fingerprint on the first connection can be configured using the varAutoAcceptAllCerts setting in the one-click HTML file. See Section 5.4.1, Global iAgent Settings. iTivity also supports commercial SSL digital certificates purchased from Verisign or other Certificate Authorities. For more information on certificates, see the iTivity Deployment Guide. 2.6.3 About iTivity iServerChoose this option to display the About dialog containing version information.
2.6.4 Stop iTivity iServerYou can click this option to immediately stop the iServer. Caution: All current connections to the iServer are immediately lost. 2.7 Linux System Requirements
The Linux version of iServer runs of the following platform. Software· Red Hat Linux 9.0, ES 4.0, ES 5.0, ES 6.x or higher · CentOS 5.x, 6.x or higher · Fedora Core Centos 45, 32 and 64 bit Hardware· 1.5 GHz x86 Intel-based CPU · 1 GB RAM · At least 1 GB free disk space · At least a 100Mb network card (recommended) 2.8 Installing the iServer on Linux
Note: For information on configuring the iServer after installation, see Section 2.9, Configuring the iServer on Linux. Downloading the Distribution File1. Contact Tridia for the URL for downloading the iServer Linux distribution. The filename is linux-iserver-version.tar, where version is the particular version number. Example: linux-iserver-6.0.00.tar Note: Many popular Window's based ZIP file utilities do not properly extract the contents of our distribution file. Please do not attempt to use them with any of the distribution files. 2. Place the downloaded file in your home directory on the Linux server where you want to install the iServer. Example: /home/username/ CONTINUING YOUR INSTALLATION1. Logon as the root user or issue the su command. 2. Change to the /tmp directory. cd/tmp [Enter] 3. To verify the presence of the distribution file, list the directory contents of your home directory: ls –l /home/username/*.tar [Enter] 4. Extract the distribution (*.tar) file: tar xvf /home/username/<filename> Several files are extracted into the /tmp folder. One of these is the install script. Note: At this point you can remove the distribution file by moving it to a different directory or using the rm command. 5. Run the install-iserver script. ./install-iserver A Welcome screen is displayed:
6. Type y to proceed. The program checks for a prior version of the iServer and preserves the license information if it exists.
Press Enter to continue. If a prior version exists, the files are removed.
7. Press Enter again to continue. The following screen is displayed, allowing you to change the Registration Port if needed.
8. Change the port if desired. Otherwise just press Enter. The Host Description screen is displayed.
9. Enter a Description to be used to identify this iServer in iTivity iManager. Then press Enter. The iServer Install Directory Screen is displayed.
10. Press Enter to accept the default directory, or type a different directory and then press Enter. If the specified directory does not already exist, you are prompted to confirm creating it. Type Y to confirm. The program extracts the iServer files. You are then prompted to specify whether you want to install the Support Module files on your web server.
For more information on the Support Module, see Section 5.3, Installing the Support Module. 11. If you want to copy the Support Module files, type y and continue with Step 12. Otherwise, type n and continue with Step 13. 12. Enter the directory where you want to copy the Support Module files and press Enter. If the directory does not already exist, type Y to confirm creating it.
The Support Module files are installed and a message is displayed when the process is complete. Press Enter to continue. 13. The installation continues and a number of status messages are displayed. Press Enter to continue. You are prompted to specify whether or not to start the iServer listening daemon at system startup. The daemon must be running for the iServer to accept connections. It can also be started by issuing the start_iServer command.
Type y to start the daemon at boot time or n to cancel this option. 14. The program prompts you to specify whether or not to remove temporary installation files. Type y to confirm or n to cancel. If you typed y, the files are removed. Press Enter to continue.
Installation is now complete.
2.9 Configuring the iServer on Linux
2.9.1 Editing the iServer.conf FileFor the Linux version of iServer, all configuration settings are controlled by an ASCII text file called iServer.conf, which is placed in the installation directory on the Linux computer. You can change the settings by opening the file in any text editor. The following table describes the settings in the file.
2.9.2 Changing a ConfigurationYou can change configuration options without stopping and restarting the iServer software. The options can be changed without losing current connections. To reload the settings of a running iServer, run the following script: /usr/lib/iTivity/iServer/iServer_config_reload 2.9.3 Running Multiple iServers on One Linux
|


|
COMMON OPTIONS |
|
|
dataDir |
Each iServer needs its own unique dataDir |
|
FilePath |
This variable points to the unique License File for each iServer. |
|
vnchostname vnchostdesc |
The name and description should be unique for each iServer to make them distinguishable in iTivity iManager. |
|
CONNECTOR OPTIONS |
|
|
transportPort iasServerPort |
The listening ports for iTivity iManager and iAgent connections must be unique for each iServer. For example, you might make the following settings if running two iServers on one Linux server: iServer #1 (default ports) iServer #2 |
|
PROCESSOR OPTIONS |
|
|
permissionGroup |
Each iServer is typically given its own user group. |
|
connectPort |
Set to a unique port number for each iServer. |
|
commandSvcPort |
Specifies the internal port number used by the connector daemons to find the listening port of the processor daemon. This setting is only for use with multiple iServer configurations. It should not be used when only one iServer is running on the system. When this setting is used, it should always match the connectPort setting of the processor. |
|
ISERVER OPTIONS |
|
|
clientPort |
Set to a unique port number for each iServer. |
2.10 Licensing the iServer on Linux
After installing, you must license the iServer to make it operable.
As explained in the Welcome to iTivity section of this guide, your iTivity license allows a given number of concurrent connections between iManagers and iAgents through the iServer. The license you purchase determines the number of concurrent connections that your iServer allows.
Note: It is also possible to license iAgent software separately. When an iAgent is licensed separately, its connection to an iServer does not count as one of the connections allowed by the iServer license. Contact Tridia for more information on this option.
2.10.1 Obtaining the License Key
When you purchase your license, Tridia provides a license key. The license key is a series of numbers with hyphens:
Example: 533-0025-32-112012527
When you install the iServer, the install process generates an install code. You can display this install code by running the License Status command (see Section 2.11.2, below).
To activate your iServer, you use the install code to obtain an activation key. The activation key is generated based on the install code and is unique to your iServer system.
To obtain your activation key:
1. After installing the iServer, type the license_status command to display your License information. Note the install code.
2. Contact Tridia with the install code to obtain your activation key, or visit the Tridia Support Site at https://support.tridia.com/ and choose the Licensing option.
After obtaining both the license key and activation key, you can proceed with licensing the iServer.
2.10.2 Entering the License Information
You enter the License Key in the LicenseData.txt file. This file is automatically created in the iServer installation directory when you install.
You can edit the LicenseData.txt file with any text editor. Follow the instructions in the comment area of the file to enter your License Key and Activation Key.
Example: 533-0025-32-112012527: DIBDRGS:AHWONGS:MMJYEAK
2.11 Linux iServer Components and Commands
2.11.1 Component Files and Subfolders
The following table lists and describes the files and subfolders that make up an iServer implementation.
|
Folder or File |
Description |
|
bin |
Directory holding binaries and programs. |
|
BUILD |
Link to BUILD_# |
|
BUILD_1 |
Build# of this release |
|
connector_ia |
Starter script to one of the iserver programs. No user interaction is required. |
|
docs |
HTML documentation files. |
|
init_iserver_daemons |
Used to start iserver at boot time. |
|
install_daemon |
iServer installation script. Used to install the iServer to run at boot time. |
|
iServer |
Starts one of the iServer programs. |
|
iServer_downall |
Shuts down all running iServer programs. Caution: The stop_iServer command is the preferred method of stopping the iServer. Run iServer_downall only if stop_iServer fails. You must be the root user to issue this command. |
|
iServer_perms |
Holds inventory and permissions settings to all iServer files. |
|
iServer_version |
See Section 2.11.2 iServer Commands. |
|
itivity_data |
Directory that holds all of the data files used by the iServer. The directory can be configured via the iServer.conf file. |
|
iTivitySupportModule |
Directory containing all of the files for one-click installation of the Unattended and Attended iAgents. Refer to Section 5.3, Installing the Support Module, for more information. |
|
iTivityUserGuide.pdf |
PDF version of this User Guide. |
|
LICENSE_30DAY.txt |
Text file containing the 30-day license agreement. |
|
LicenseData.txt |
Text file used to enter the license keys. See Section2.10, Licensing the iServer on Linux. |
|
LICENSE_FULL.txt |
Text file containing the full license agreement. |
|
license_status |
See Section 2.11.2 iServer Commands. |
|
licmgr |
License Manager program. No user interaction is required. |
|
PLATFORM |
Description of the platform supported by this release of the iServer. |
|
processor_ia |
One of the iServer programs. |
|
rc_iserver_daemon |
Script used by the startup programs under some operating systems when the iServer is to be started at boot time. Normally does not require user intervention. |
|
README |
Text file containing updated release information. |
|
remove-iServer |
Program used to remove the iserver from the system. |
|
sample_iServer.conf |
Copy of the original iServer configuration file. System administrators can copy this file and use it to create more than one instance of the iServer to run on their systems. |
|
start_iServer |
See Section 2.11.2 iServer Commands. |
|
stop_iServer |
See Section 2.11.2 iServer Commands. |
|
VERSION |
ASCII file containing the version number of the installed product. |
2.11.2 iServer Commands
Administrators can use the programs explained in this section to display information about the iServer and control its operation.
iServer_version
This program displays the exact version of the iServer currently in use, as shown in the following example.
license_status
This program displays the current license information for the iServer, including the Installation Code and the number of allowed connections.
start_iServer
You can use this command to start the iServer. You must be the root user to issue this command.
stop_iServer
You can use this command to stop the iServer. You must be the root user to issue this command.
2.12 iServer Activity Log
On both Windows and UNIX/Linux systems, the iServer maintains an audit log of activity. The central audit log records information each time an iAgent system connects to the iServer or disconnects.
The information includes the authenticated username at the iServer as well as the username (if any) used to authenticate to the iAgent system.
The activity log is a CSV text file stored at one of the following locations:
|
iServer OS |
Central Audit Log Location |
|
Windows |
/Program Files/iTivity/itivity_data/activity.log |
|
UNIX/Linux |
/usr/lib/iTivity/iServer/itivity_data/activity.log |
The following listing shows an example section of the activity log.
101,,agent_connect,2005-05-06 15:42:17,-1,-1,,,209.168.166.227,209.168.166.227,,,,,,,,,,
102,,agent_disconnect,2005-05-06 15:42:25,-1,-1,,,209.168.166.227,209.168.166.227,,,,,,,,,,
101,,agent_connect,2005-05-06 15:42:41,-1,-1,,,209.168.166.227,209.168.166.227,,,,,,,,,,
102,,agent_disconnect,2005-05-06 15:43:03,-1,-1,,,209.168.166.227,209.168.166.227,,,,,,,,,,
More Information: For more information on the activity log, see the iTivity Deployment Guide, Section 4, Troubleshooting.
![]()
| Table of Contents |
Copyright © 2017 - 2023, iTivity Corporation
Copyright © 2004 - 2016, Tridia Corporation
Copyright and License Information